Showing posts with label pink. Show all posts

Sunday, July 22, 2012

Random Cards

Yesterday was my due date, but still no baby.  People didn't believe me when I said there was no way she would be on time!  I'm treating myself to a pedicure this afternoon though, and maybe the massage around the ankles will trigger something.  Hahaha. 

On to the cards...most of these are from the scraps in my scrap drawer.  Which is still on the verge of overflowing.  It's amazing considering that I've made 20 plus cards from scraps alone. 


Friday, July 20, 2012

New Craft Toys!

I went to the craft store this morning to pick up a few things...and there was a sale!  Yay!  I picked up a few more things than originally intended, but I rarely shop so it's all okay.  It will keep me busy for the next few days until baby arrives (and it looks like she is going to be late).


 This didn't use any new stamps/toys.  Just one I made because I saw this color scheme on Pinterest and thought "Hey, that would make an awesome card!"  The leaf and sentiment are SU stamps.  All colors are SU inks - So Saffron, Summer Sun, More Mustard, and Ruby Red.
 This one does use a couple new toys.  :)  Hard to believe that, before today, I didn't own a butterfly stamp.  My mom was always nice enough to loan me hers, but I really needed to invest in one.  Well, this is from a set of five.  Variety is good.  The alphabet stamp is also new.  Love the clear mount stamps - so much easier to line up than the ones on wood.  I also invested in a new cutting system.  This one does circles, ovals, squares, and a couple different edges (in this case the scallop edge around the butterfly).  The background is the result of me just running the inkpad up and down my card.  I wanted a gray background, but evidently gray isn't all that in style at the moment and I couldn't find gray card stock that I liked!
 Card three uses two new stamps from the Martha Stewart stamp around the page set that I bought.  The concept is that you can make borders easily, but I think it works out this way too.  :)  The color scheme is from yet another pinterest post - yellow, white, and gray was super cute.  The ferns and butterflies came from two different sets.  The yellow paper is actually white, smeared with SU Summer Sun to match the butterflies.  The "gray" paper was the result of me setting paper on the ink and pressing it down with my fingers.  It came out really well!
This is the final card of the day (for now).  I have always wanted to do something with the scalloped layers, but not having a border punch or edge made it difficult.  For this, I took four shades of blue and went to town with a large scalloped edger, and then layered from lightest to darkest.  The boat is SU Close to Cocoa, Chocolate Chip, and Creamy Caramel inks smeared across the paper.  I used a craft marker to make definitive "boards" for the boat and then cut the shape.  The fishing rod, line, and hook are hand-drawn directly onto the card.  Since the card is about fishing, I put a little red fish in the pond for the fisherman.  (He is napping in the boat, that's why you don't see him.  Yeah.) 

Thursday, July 19, 2012

October and Others...

October

Halloween - possibly one of my favorite holidays!  I love the dressing up and being something other than yourself for a night.  I am not so into the gory/gross stuff that tends to come along with it now.

This is a very simple card (as are most of the cards I make), just a cauldron of some green goo bubbling up.  Reminds me of Shakespeare's Macbeth.  Everything was cut freehand.  The goo is two separate pieces of green paper - the bottom part is actually a scrap from cutting the shape of the top part of the goo!


And now miscellaneous cards...all of which will be going to the Operation Write Home box.  Their no glitter rule kills me (oh, how I love glitter!), but it is for the protection of the soldiers and I completely understand!

First up, a Christmas card.  Santa's belly to be exact.  I used black ribbon and a piece from the SU hodgepodge hardware set to make the belt.  The fluff at the bottom is a bit of cotton ball.


Next up, You're So Sweet.  The background is from the Sweet stack by DCVW.  Every other page is glittered and I decided that I would make a card with every non-glittered page for the OWH box.  I bordered it with a baby blue and printed the sentiment with my printer, added a couple brads, and used dimensionals to make it pop.  Everything is outlined in brown - either SU close to cocoa or chocolate chip.


And from that same piece of paper, a second card.  I like the concept of bubbles, so I picked up my trusty circle cutter and had at it.  The green, brown, and pink papers are scraps that were sitting in my scrap drawer.  They picked up colors from the circle nicely.  I edged each with a slightly darker ink for contrast.  The white background was too boring, so I used a bit of blue and  sponged until I was happy.  :)

Saturday, July 14, 2012

April/May


Remember that saying from elementary school?  "April showers bring May flowers, what do Mayflowers bring?"  The first time it would stump your friends, but then it spread like wildfire - Mayflowers bring pilgrims!  That little saying was the inspiration for my April card.  I've never had a pair of rain boots, but I do remember having the cutest yellow and white checkered raincoat in elementary school.


April

All items were hand-cut and decorated.  I thought the hearts would be much cuter than just circles for the buttons.  The background was lightly/randomly brushed with a darker blue ink for a little contrast.  Mount it all together and you have the card for April!


May is the busiest time of year for me (well, maybe it's tied with late August).  It's the end of school and everything has to be wrapped up - this involves at least one evening concerts and two competitions in addition to the "normal" school stuff like grades, discipline, uniforms, and inventory.  That being said, I try to keep vibrant colors around me in May to keep me going.  I found the green paisley-patterned background piece in my scrap drawer and just loved it.  Then I thought bright pink and yellows would compliment it perfectly.  And according to my elementary school saying above, May means flowers!


May

I'm not gonna lie here, the flowers are glittery stickers that I inherited somewhere along the way.  I knew my green background scrap wasn't big enough, so I supplemented with the yellow.  Stickers added, card complete.  :)

Thursday, July 12, 2012

January/February

I know, I know!  It's July.  Which means hot and hotter weather, vacation, and (for me anyway) baby time.  However I did start working on next year's collection of monthly cards for my grandmother-in-law.  I have a few rules this time around though. 

1. Each card must have the month somewhere on it.  This is for my own sanity.  I've added "2013" to most of the cards just because I feel like it.  When hubby asked if I had sent a card at the beginning of the month, I would answer yes and then second guess myself.  Did I send a card?  Was it the "right" card?  Obviously it was easy to tell if it was holiday themed...

2. Cards fronts must be made of scrap paper only.  My scrap drawer is filled to the brim.  Seriously.  I must have liked the paper in there before, so surely I can use it again.  Embellishments, inks, stamps, whatever can go on top, but the paper MUST be from my scrap drawer.

3.  Take a picture as soon as I am done with it!  Because otherwise I will forget.  This means that these pictures are coming from my phone because my :"real" camera is packed in my suitcase ready to take the first pictures of the baby.  I am NOT going to risk getting to the hospital without the camera because I wanted good card pictures!


January
Yup, even the white paper is from the scrap drawer.  Navy blue background, white background, champagne paper.  The glass in the bottom right was outlined/colored with white ink.  I wrote 2013 to make it look like one of those souvenir glasses from the party stores.  I also made it glittery, but it's really hard to tell in the picture.


February

Ahh, Valentine's Day.  The papers are actually left over from a baby shower card I made towards the end of last school year.  I stamped the hearts in a slightly darker pink, cut them out, and added a little bit of glitter glue.  The pink strips at the bottom are three separate strips that I edged with the pink ink.  Took my corner rounder to the background paper, and the wavy blade on my cutterpede to the bottom bit of brown.  After that it was a matter of layering everything together.  (The month is in the bottom left corner, but it is extremely hard to see!)


More to come later...it may be sporadic because baby is due any time now!

Sunday, July 31, 2011

Back from TODA!

I am back from the TODA conference.  For those of you wondering what TODA is, it is the Texas Orchestra Director's Association.  Yep, orchestra teacher/director is my day job.  :)  I love it.

Today's card is inspired by my days at the conference and a friend who was also there.  We had  a blast and have a ton of ideas to take back to school in a couple weeks.  But until then, I insist on enjoying the rest of my summer!


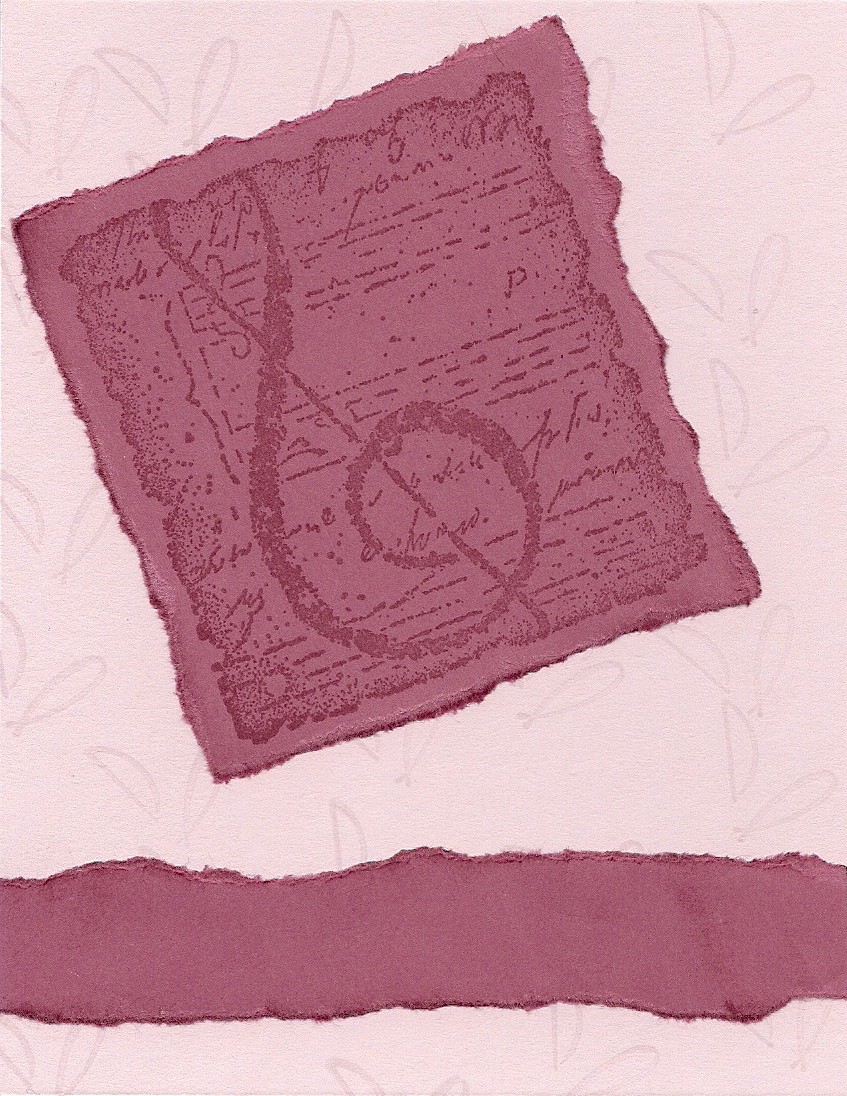
The colors turned a bit brighter when I scanned the card.  It looks more pink than the real thing and I'm not a wiz with editing photos.  The background is a very pale purple, with leaves stamped in VersaMark ink.  The other paper is a shade I would call rose.  Once again, VersaMark makes the perfect non-color for stamping.  If you aren't familiar with the VersaMark ink, you should get some.  It basically darkens the paper you are stamping on a few shades.  It is always the perfect contrast color!  Both the stamps I used came from StampinUp!

Wednesday, July 20, 2011

Variations on a Design

Last night I found myself wanting cupcakes.  Seeing as I already have ice cream at the house, I didn't run out and get a cupcake or cupcake mix.  So I settled on making cupcake cards.  The blue one will be sent to OWH, but the pink one will have to go to a friend...because I couldn't resist using a glitter background.  There is a bar of pink at the top, too, but my scanner refused to pick it up.  I rescanned several times, but it is just being stubborn!


Enjoy!

Wednesday, June 29, 2011

It's a 2 Card Day!

Yup, that's right TWO whole cards!  The first is inspired by my friend, M, who likes Hello Kitty.  And how can I blame her?  Hello Kitty is rather cute.  I love her black, white, and pink color scheme.

The background card stock is pink.  I cut the polka dot paper with my cutterpede wavy blade.  Before I attached it, I folded down one corner and put a brad in.  The stamp is from the "Greeting for All Reasons" Stampin' Up! set.  I stamped the bright pink heart first and then slightly offset the white version.  The white is hard to see from the picture, but it looks really good in person.

The second card for today came from just playing around with the sponging technique.  It took me a while to learn a few things about sponging.

1) Be patient and don't press too hard!
2) You have to overlap your colors to get it to look cool
3) The darker color doesn't always have to be the edge.  It can bring attention to the center, too.
4) Lay your colors out before you start and do a test run on spare paper.  The colors may look okay together on their labels and pads, but can turn out differently when you start sponging!

I hadn't done anything in the purple realm before so I thought I would give it a try.  I think it looks cool.  The rose stamp is one I picked up randomly from Michael's because it was on sale at the time.  It is colored with watercolor crayons.  The varied tones of each color (SU! colors Elegant Eggplant for the flower, Always Artichoke for the stem and leaves) were a result of how much water was in my blending pen at that moment.  The background is a combination of Orchid Opulence, Lovely Lilac, Elegant Eggplant, Perfect Plum, and Regal Rose.  I used a corner rounder on the edges to give it a softer appearance.